

I feel like sometimes people can get a little overwhelmed when they first go to the Polyvore website. I got the idea to have an easy little "guide" to Polyvore complete with extra little tips when it comes to creating. I hope you enjoy this, and be sure to follow me!
When you make your account... You'll see tons and tons of items, random creations and sets, collections, ect. It can be a little overwhelming, but don't let that get to you! It's time to start following some people. Are you a lover of the preppy fashion style? Then simply search prep and see what comes up! Follow a few people.. and like some items from them.
Liking Items
Liking items is easy. All you do is click on or tap the heart! The reason you need to like items is so you can have a wide variety of things to add in your sets. You can like basically any item. You can always search for a brand, company, type of product (ex. chairs, t-shirt), or go to your favorite website (jcrew.com) and clip items from that website.
Clipping Items
Let's say J.Crew just released some new products, and you are obsessed. You just can't wait to style these products in some Polyvore sets. but hmm you're wondering how to get those products into your Polyvore items collection. Let me tell you how! On the app, you can go under the Create > add item > my items > clip items from web. Type in the url or run a google search for the website you want to go to.


If you're using the website, things are a little different when it comes to clipping items...
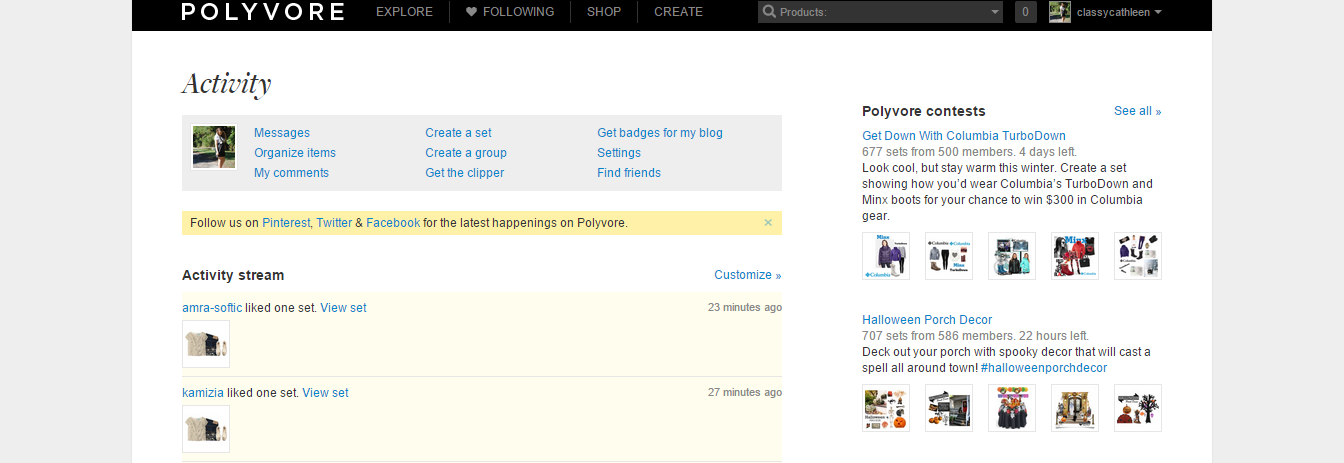
See in that top right corner where it says "classycathleen" ? Your username should show up there. Click on that number in the square next to your username. You should see something very similar to the screen above. Click on "Get the Clipper". Follow the directions, and your bookmarks bar should look a lot like mine especially if you use Google Chrome.

Now you know how to like any items you would like to include in your sets. Which is extremely helpful when it comes to making blog collages! Like the one I used in this post on Preppy Monogram Style. I went on Belk's website, and clipped some images and used them in a set for the post. Which leads me into my next point!
Creating Sets
I'm gonna walk you through what I do when I create sets.. Which is usually on the iPad app!
When I go to make a set, I start with one item, and build an outfit around that one item. In this case, it was this J.Crew sweater. You tap on Add Item and search for an item, or look under your "my items" section and you can see all the items that you have ever liked.
When you finish, you publish your set. Give it a creative name, and post!


Some Random Tips:
- Follow a lot of different accounts so you always have inspiration, and new ideas.
- Challenge yourself to post every day! Your followers really love it when you have new content every day.
- Link your blog in the descriptions of your sets. You'd be surprized at how many readers I have gotten from Polyvore.
- Be sure that the items you use in your sets don't have weird white areas around them. If they do, you can fix it on your computer.
- When it comes to getting more followers, you can always message people and do shout outs and things like that.. Or, you can just post sets more than once a day, and people should find you!
- Don't get discouraged by how your sets look when you're just starting out. Mine were absolutely awful!
- Don't always use Polyvore for just blog graphics.. Give people something worth their follow, and not just blog post sneak peeks. You know what I mean? Just have fun!
- GET THE APP. It helps a lot! If you get confused on the website, the app is a lot easier to figure out in my opinion.
Me being a blogger myself, I use Polyvore quite a bit.. I even used Polyvore to make the graphic at the top of this post! If you're a fashion blogger, you can use Polyvore's collection of symbols such as arrows, lines, and numbers to create graphics to go along with your posts. Same with you beauty bloggers out there! For house and home bloggers, there are furniture items and things that you can like and then use those to create sets for your posts. And even if you are a personal blogger, you can still use it for things like Friday Favorites and/or Monthly Favorites. Basically, I'm saying there are so many great uses for Polyvore!
Some More Tips...
- Make sure your text is easy to read! Some people use some crazy fonts that look great, but when you're going for the magazine quality type of set.
- You can clip photos from your own blog or other blogs using the "Polyvore Clipper"!
- Use different colored texts, different fonts, and add frames by browsing all items
Embedding Your Sets into a Blog Post:

This button is a Blogger's best friend when it comes to Polyvore. If you know basic HTML, then you can figure this out! You can get to this button by opening up all of your sets (on your computer). Then its as simple as copying and pasting, and then you've got a perfect image right in your blog post!
If you ever have any questions related to Polyvore, please do not hesitate to send me a Direct Message on Polyvore! I would be more than happy to help you out:)
Also, do me a favor and follow me:) I try and post about every day.. So you can always find me there! If you read this post and followed me... Message me, or comment on this post so I can follow you back:)
