Showing posts with label diy. Show all posts

Aug 24, 2015

#bloggersBTS A Couple DIY's to try

I love the idea of a good do-it-yourself project.. Heck I even have an entire Pinterest board dedicated and stuffed to the top filled with inspiration and DIY projects. So I just am not the best at completing those DIY projects. They never come out quite the way I had pictured in my head and often times I just have to get creative. Guys, I couldn't even washi tape some pencils because the tape was getting tangled and bent and stuck to itself so... that was that. 


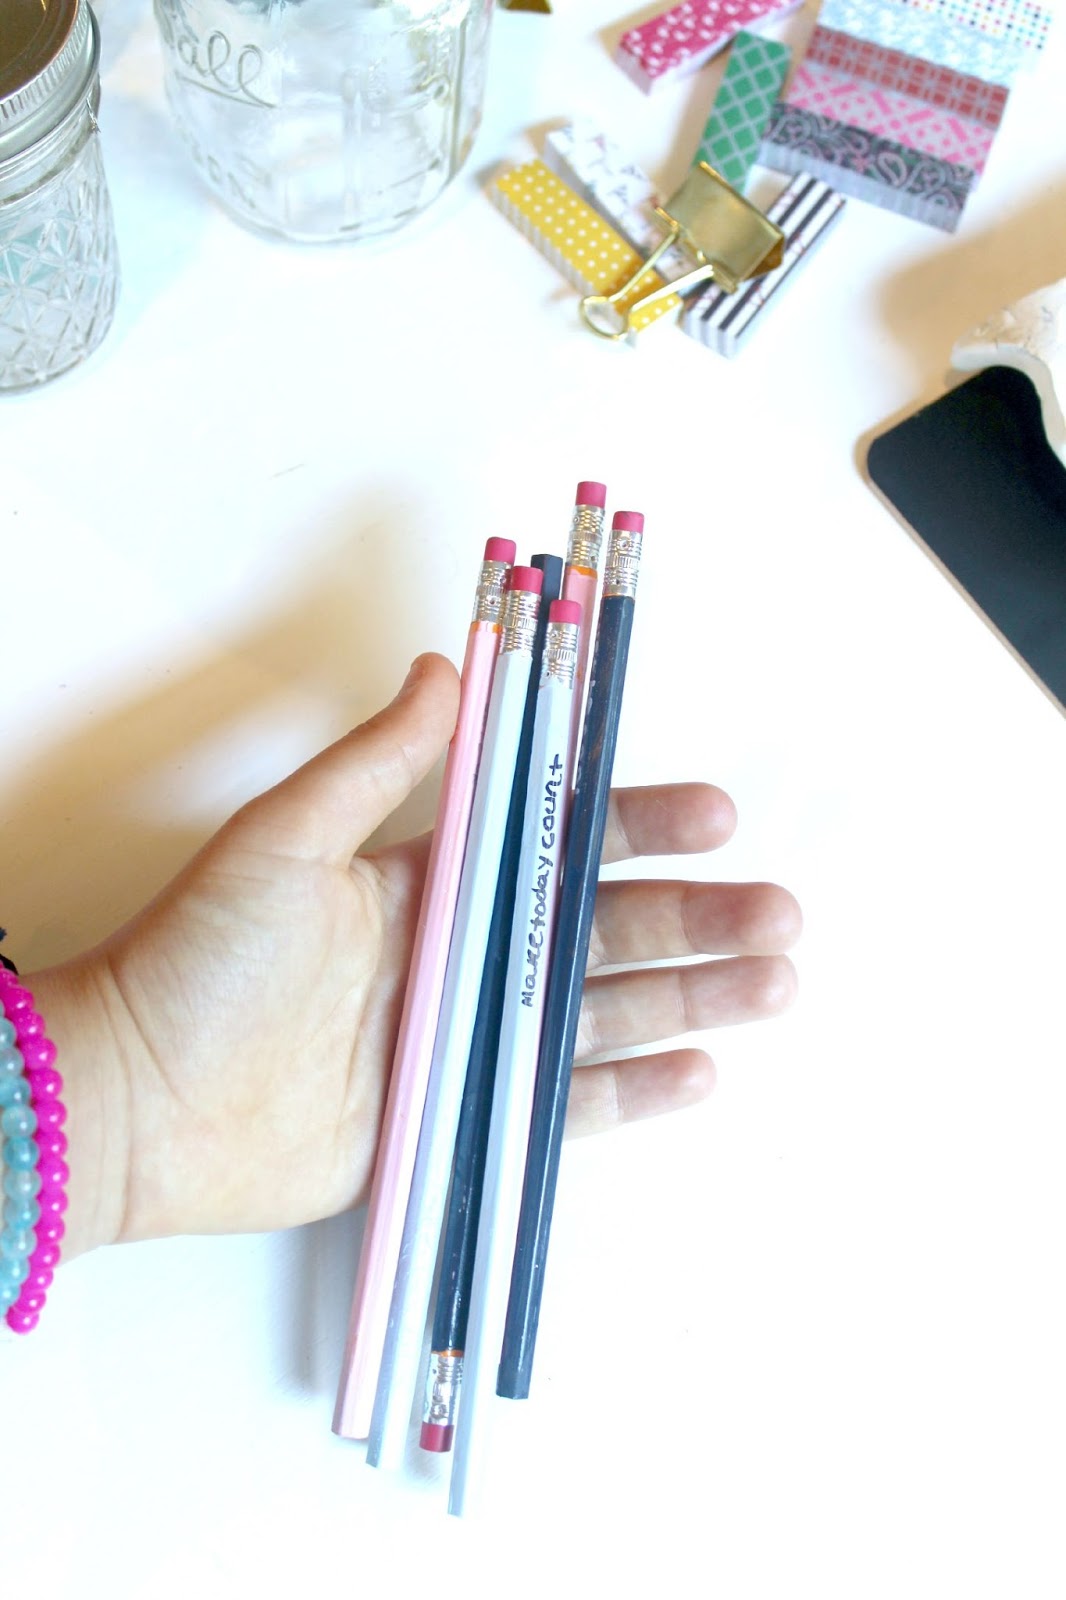
So the main DIY project I was focussed on was the Kate Spade inspired conversation type pencils. I headed to my local Walmart and bought 8 packs of cheap pencils so I could paint them... Then as I was perusing the office supplies and paints for the pencils, I discovered chalkboard paint.

I have always wanted chalkboard paint ever since I was a little kid honestly. I thought it was such a cool idea to just paint, and then be able to write in chalk on something.. Like how awesome is that?! I scooped it up and raced to the cashier so I could purchase the paint before changing my mind. I went back to Walmart yesterday only to find the clipboards marked down to 50 cents. I thought it was just meant to be so I grabbed one and took off.


So of course as soon as I got home, I got to work painting the clipboard...

oh yeah.. then there was this notebook that I painted too.. because really a chalkboard notebook how much cooler does it get?


These are the paints I picked up.. I was really feeling the blue! And then I figured I should throw in another color just so it wasn't too boring.


So I was painting these pencils see, and I don't know.. they just weren't coming out good. I was making a mess, paint everywhere, dropping brushes, dog fur, yuck, and then I had like a few good ones so I wrote on them and messed up on writing......... I just don't think it was meant to be. BUT THAT'S OKAY! You might have better luck than me! 

The second trip to Walmart, I figured what the heck and I picked up stuff to make a couple tassel bracelets. 

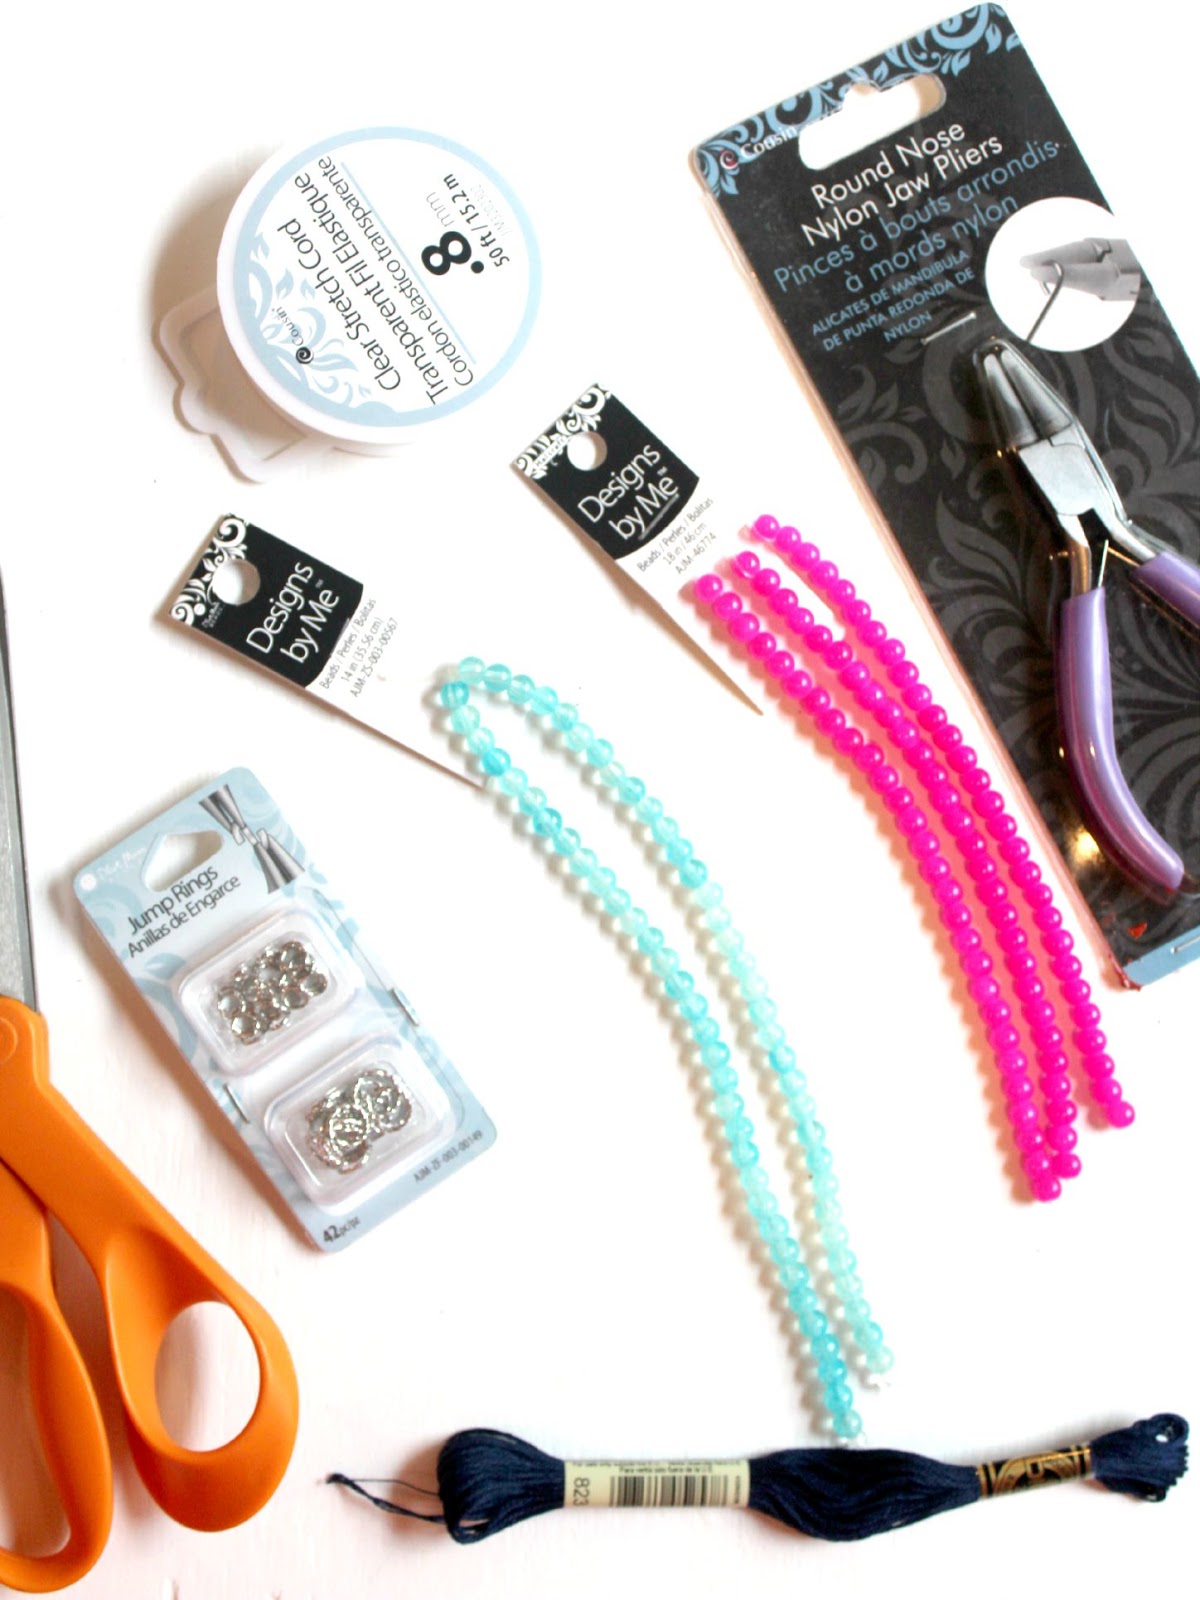
Out of everything else.. these came out decent. I used silver wire and ring thing just because I don't wear a lot of silver jewelry and wanted to switch it up. 


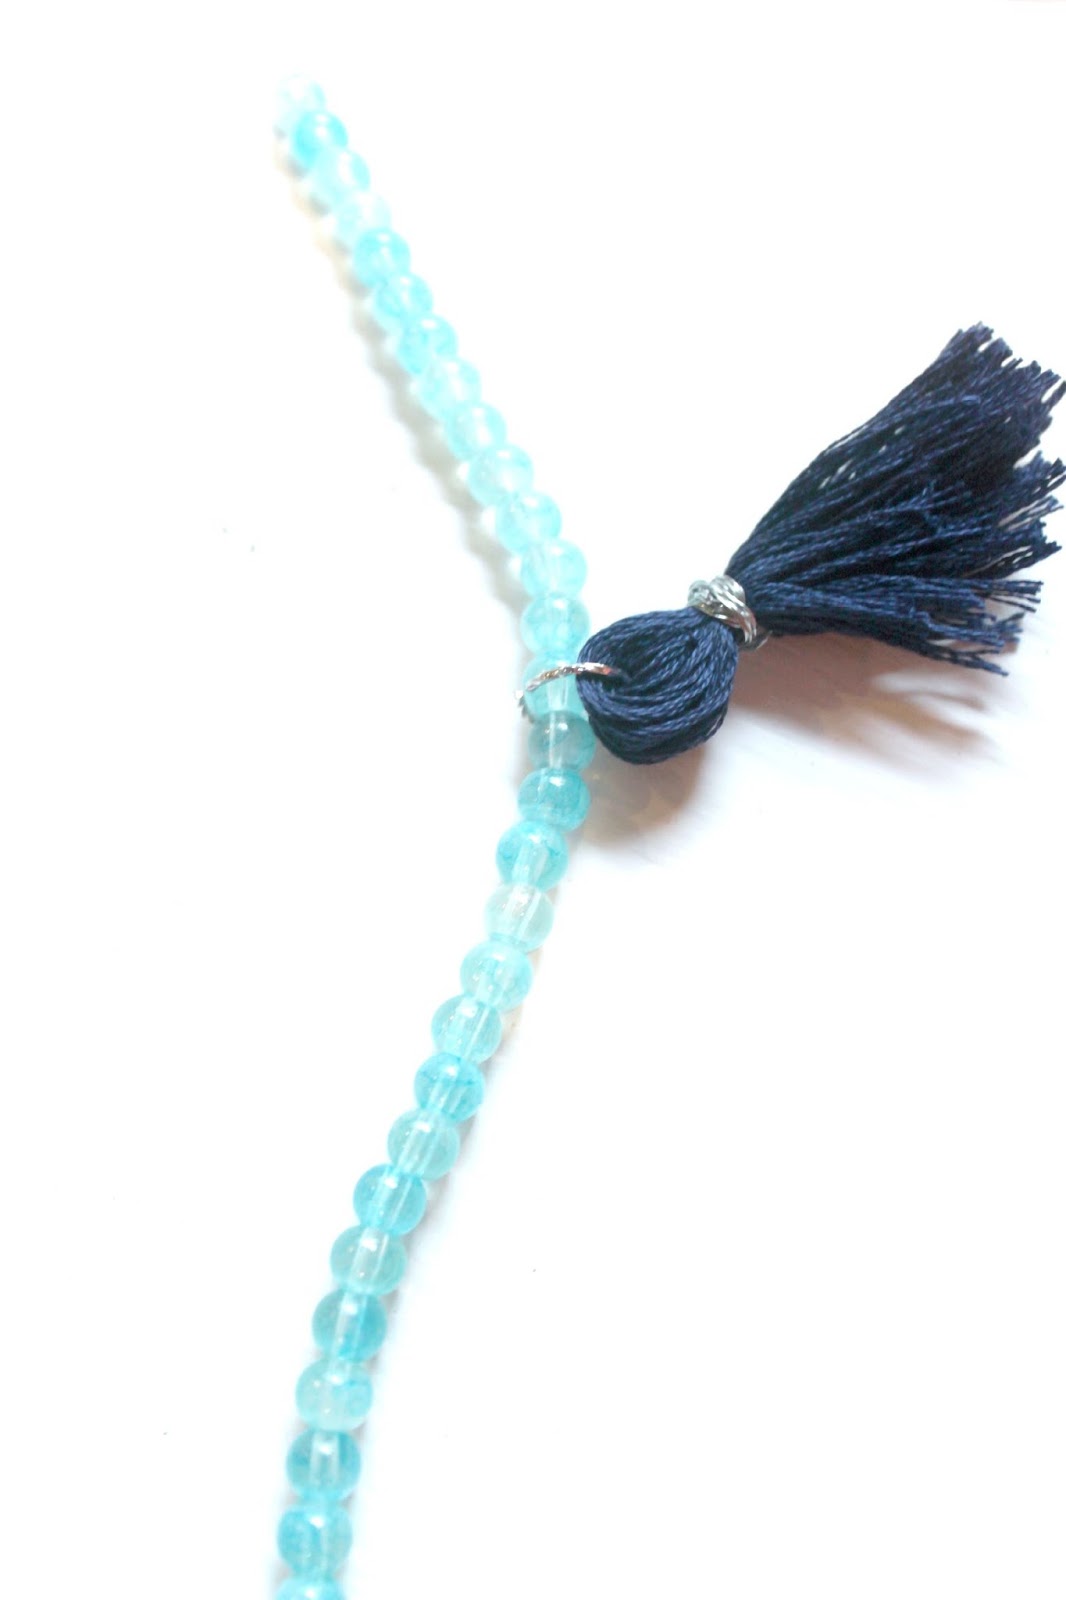
 They came out alright...


I also ended up painting a binder cover for English instead of designing one on the computer.. I actually really like how it came out.. You can barely see in the picture, but I love it!


 So all in all I learned this week that I am not a good DIY-er and me wandering into the office/craft supply section is highly dangerous seeing as how I obviously have no idea what I'm doing.. fingers crossed your #bloggersBTS DIY projects came out better than mine! Link up below, I'd love to see!

Apr 1, 2015

DIY Tassel Bracelets with Sarah (Giveaway)

A very special "Happy April" post for today! Y'all remember Sarah from the most recent "Tuesday Talks"? Well, she's here today with a super fun DIY (and giveaway!) with these adorable tassel bracelets. The tassel trend was one of my favorites last year and I was so sad when it died off in the Fall & Winter months. But guess what, It's back! WHOOOO! As soon as I get off of Spring Break I'm gonna run on over to Hobby Lobby and find some supplies to make these myself! I'm in love, and it's just such a simple DIY project! Let me know what you think in a comment.. But only after you've entered in the giveaway haha!


Tassels are super trendy this spring, and today I am going to show you how to make your own tassel bracelet! It is not only simple and easy, but also cheap. It took me about 20 minutes to make the first one, but only about 5 to make the others once I got the hang of it. 

Here is what you are going to need:
A good pair of scissors (mine were not very sharp)
Pliers ( I got mine for $7 at hobby lobby)
Stretchy clear cord for the bracelet
Thin wire (I chose gold)
Beads (I found they were much cheaper at Hobby Lobby then Michaels)
Embroidery thread, each pack makes one bracelet
A card to wrap your thread around
Gold jewelry crimps

1. Cut off about 1 1/2 feet of the thread and fold it in half twice. Now cut off about 1-2 inches of the wire and make a small circle big enough for the thread to fit though and twist it off with your pliers. Now thread your folded thread though your circle and leave it in the middle, and set aside.

2. Take the rest of your thread and wrap it tightly around your cord and then cut at one end. Now tie the thread you set aside in the middle with your little metal circle on top.

3. Now hold down your threads to create the tassel, and then wrap some of the wire around it tightly and then twist off with your pliers. Take your sharp scissors and trim your tassel.

4. The hard part is over now, thread your beads onto your plastic cord, thread both sides of the cord though a crimp and then the tassel, see picture above, and then crimp them down with your pliers to keep your bracelet together.

Enter in below to win TWO tassel bracelets !!!
a Rafflecopter giveaway


post signature

Dec 21, 2014

Easy DIY Christmas Gift

I'm always that one that just looks at the calendar I don't know maybe four days before Christmas... And realizes that yes, Christmas is in four days. Immediately all these thoughts go through my head: what should I buy for Sarah Grace and Kayla? Oh no! I still haven't sent out Christmas cards.. Um maybe Merry late Christmas will work? (I'm so so so so sorry about that Undeniabaes and Blogmas girlies! You'll get them from me soon!) And then there's my twin that I still need to send a present too, and my Undeniabig....... ect. ect. ect. ect. 

But anyways, I feel like some of the best presents are the ones made by hand. They're usually the most memorable and meaningful gifts. If you search Pinterest, you can always find inspiration for any do it yourself projects you would like to do. Here's my inspiration for today's DIY project: 


This morning I headed out to Walmart and picked up a few things.. Some basic white mugs, Sharpie (oil based) paint markers, and some basic stickers to trace. It doesn't matter which font or size of sticker you use just as long as it's big enough to trace. And that's basically all that you need for this project. Well, and an oven.. but most people have that. 

Let's get into this project: 


Start with your mug. Wash it and dry it well (both the inside and the outside). 


See those stickers? That's what you're going to trace on your mug! So go ahead and get sticking..


Half of my name done...


And here's all of my name! Once you finish sticking your stickers, it's time to outline the letters. 


Silver and Gold Sharpies make me so freaking happy. I just love the look of them! These are oil-based, paint marker Sharpies... Not just regular Sharpies. For some people, regular Sharpies work.. But not everyone so I wanted to be on the safe side with these markers. 


Outline the letters in dots. This is just what I do, but you can just as easily write or draw something on the outside of the mug. 


Take the marker and start filling in the mug the way you want. For my design, I wanted lots of dots concentrated in the middle o the mug, and almost fading out. But y'all do whatever you want:)


When you're completely done with your design, take the stickers off carefully. Next step is making it permanent. You don't want your beautiful design to come off when you're washing it... So put it on a pan and put it in the oven. Preheat your oven to 425 for 30 minutes. Once it finishes "baking", turn off the oven and make sure you leave the mug in the oven until it's completely cooled down. 


Excuse the "a"... my bad haha. Other than that little sllip up, I think this came out pretty great! I made one for my mom too.. Did you see my tweet? It's an awful photo.. my bad 

What do you think about these diy mugs? The possibilities are just about endless when it comes to these mugs! I'll probably forever be buying mugs at the dollar store and decorating them! They make the perfect Christmas gifts.. Let me know if you try them out!


This post is a part of the #countdown2blogmas collab. Do me a favor and follow the other bloggers in this collab!


post signature

Dec 4, 2014

Pinterest Inspired Holiday DIYs

Do it yourself projects are my absolute favorite. I honestly love them them because I know that there's a pretty good chance that I'm going to fail or my ideas in my head won't exactly match up to the reality of the project if you know what I mean. That being said, I find most all of my inspiration from Pinterest. I have a board for just about everything, and even with all the ones I have right now.. I still feel like there are plenty more I can still create! #confessionsofapinterestaddict P.S if you're not following me.. I'm basically on at least three times a day (yeah when I said I was addicted... I wasn't lying). So FOLLOW ME HERE.  

Anyways so here was the inspiration behind these two do it yourself projects


{golden pine cone garland}


{potato stamped wrapping paper}

SOOOO... Let's start with my DIY fail. It did not come out the way I wanted it to at all!! I couldn't cut the potato right and there were just so many problems! Hopefully y'all will have better luck than I did. P.S all these diys were made with things that I had just already laying around my house!


First you need to find a potato. Sweet potatoes would be alittle harder because they can grow all crooked like in the ground. In the picture above I have a red potato, but just regular potatoes would work great too! Chop your potato in half. 


Next, pick a shape (that's fairly easy to draw) that you would like stamped on your wrapping paper. You're gonna want to stay away from complex shapes like the holly shown above. Even the bell was quite difficult (as you can see in the finished product photos) because it was round and knives aren't really the best tools for cutting out round shapes. Try things like Christmas trees or gift boxes or if you want to do a geometric pattern.. squares and rectangles.


Cut out your shape and stick it on your potato. AND YES I do say stick because mine stuck right on! If it helps you see better on the potato you can outline it in sharpie like I did. Then, get your knife ready, and shave off the layers of the potato. Basically, YOU DON'T WANT TO DO WHAT I DID IN THE PHOTO BELOW!


I got into like potato chopping mood or something... but you're not supposed to chop. You're supposed to basically still have skin on the back side of the potato. More like the one below


Like I said earlier.. THIS WAS A FAIL. 

For the next part of this DIY you're gonna need some brown paper (the kind that comes on a roll), and some paint. I chose red and green to keep the Christmas-y mood! You then dip the potato in paint, and stamp it onto your brown paper. I had a whole lot of fun doing this.. By the way, make sure you listen to Christmas music while you are crafting. Here's some more photos:


It doesn't look like a bell AT ALL. But they kind of remind me of Christmas lights or ornaments.. I don't know haha!

Here's the finished product after I wrapped up my friend's gift in it!

Now it's time for the pine cones.. This is the SUCCESSFUL diy project out of the two! I'm obsessed with gold, and I love all things in nature. And when I saw that image on Pinterest, I just knew that I needed to recreate it and make it myself!

We didn't have gold spray paint lying around, so I decided to just use regular paint and paint the gold straight onto the pine cone. I got gold paint ALL over me, and I got asked so many questions about it at school the next day haha. Here's some photos:


This post is a part of the #countdown2blogmas collab! Make sure you check out the other girls in this collab and their blogs.. To see more posts in this collab follow the hashtag #countdown2blogmas on social media!

Carrie aka Bae of Carrie on Blogs

post signature